AWS Support – Support for Amazon Web Services
- Amazon Web Services
- FreeRTOS
SEGGER Support for Amazon Web Services and FreeRTOS
SEGGER's multi-platform Embedded Studio and the market leading J-Link debug probe fully support FreeRTOS with a straightforward user experience out of the box.
AWS IoT Core
AWS IoT Core is a managed cloud platform that lets connected devices easily and securely interact with cloud applications and other devices. AWS IoT Core can support billions of devices and trillions of messages, and can process and route those messages to AWS endpoints and to other devices reliably and securely. With AWS IoT Core, your applications can keep track of and communicate with all your devices, all the time, even when they aren't connected.
(Source: https://aws.amazon.com/iot-core/)
FreeRTOS
FreeRTOS is an operating system for microcontrollers that makes small, low-power edge devices easy to program, deploy, secure, connect, and manage.FreeRTOS is based on the FreeRTOS kernel, a popular open source operating system for microcontrollers, and extends it with software libraries that make it easy to securely connect your small, low-power devices to AWS cloud services like AWS IoT Core or to more powerful edge devices running AWS Greengrass.
(Source: https://aws.amazon.com/freertos/)
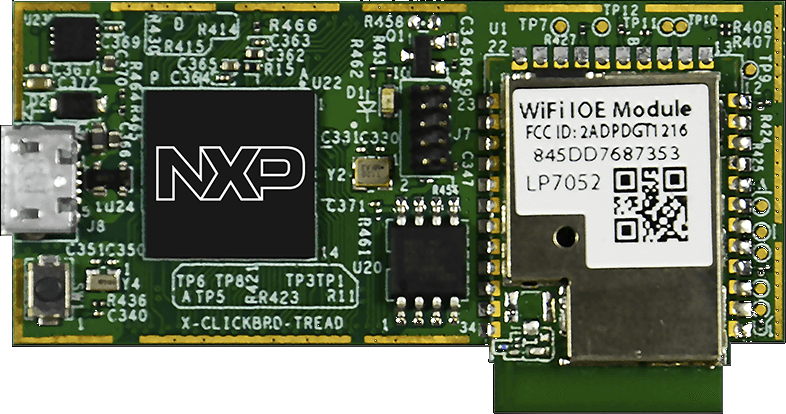
The boards that have been selected by Amazon Web Services (AWS) to get started with FreeRTOS are already supported by Embedded Studio and J-Link. SEGGER provides ready to use projects for Embedded Studio for these boards: LPC54018 IoT Module, STM32L4 Discovery Kit IoT Node.
SEGGER Embedded Studio
Embedded Studio is a complete all-in-one solution for managing, building, testing and deploying embedded applications. It includes all required tools from a powerful project manager and source code editor, and an integrated debugger with advanced debug information windows and direct J-Link integration, right through to version control features for automatic deployment of finished applications. The powerful project manager even manages industrial-scale projects, making it easy to analyze and debug your system in no time.
J-Link combined with Embedded Studio provides an unparalleled debug experience for Arm- and RISC-V-based microcontrollers using capabilities fine-tuned for software development and production: Unlimited breakpoints in flash memory eliminating hardware breakpoint limitations, and the ability to write custom loaders using J-Link's Open Flash Loader to support any type of flash memory storage. Embedded Studio features multiple means of application analysis, such as memory use and stack analysis.
Embedded Studio is a multi-platform solution supporting Windows, macOS and Linux. Embedded Studio is specifically designed to provide users with everything required for professional embedded C programming and development. It presents the market with a complete solution, delivering stability and a continuous workflow.
With straightforward licensing, free for educational and non-commercial use, Embedded Studio is ideally suited to university courses and for professional development in equal measure.
SEGGER emPower Evaluation Board
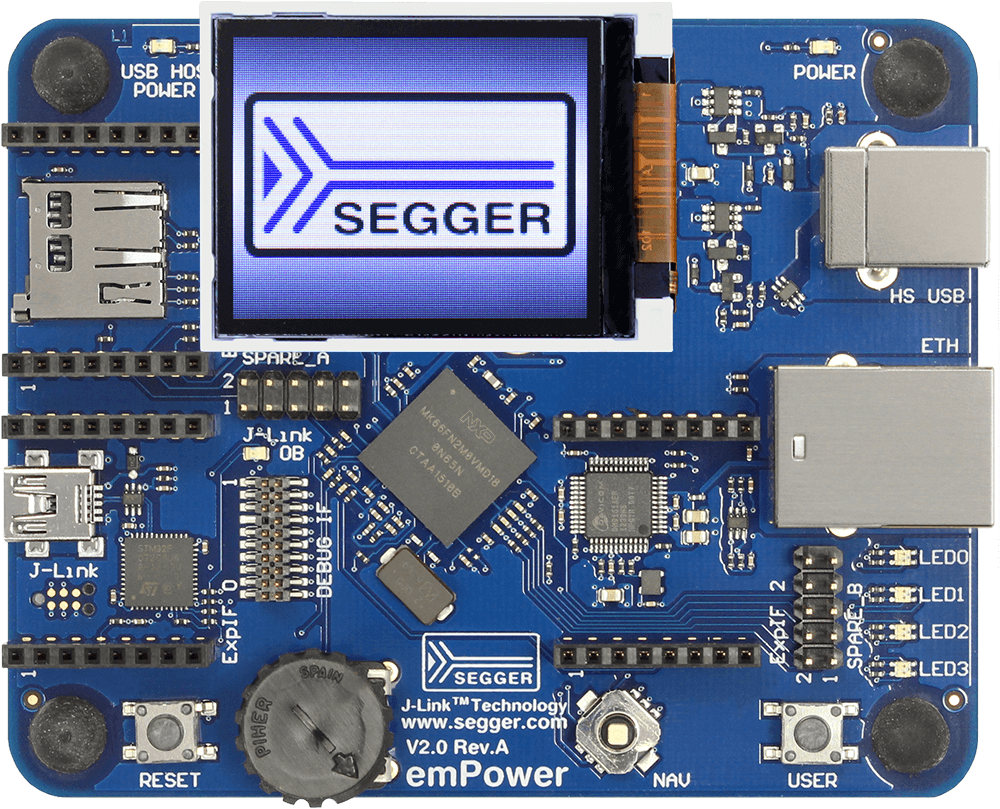
The emPower Evaluation Board jump starts new Internet of Things projects using SEGGER’s one-stop development solution.
Connecting to AWS is made easy with SEGGER’s hardware-independent embedded software bundle, which includes SEGGER’s RTOS (embOS), TCP/IP Stack (emNet) with IPv6 and WiFi, an MQTT client (emMQTT), and TLS library (emSSL) for secure connections. The SEGGER Embedded Studio IDE enables professional project development, complemented by the capabilities of SEGGER’s industry leading J-Link debug probe. emPower features a J-Link OB, the on-board version of J-Link to get started immediately. Various WiFi modules and Add-On Shields are available to extend the hardware of emPower.
Downloads:
ST - STM32L4 Discovery Kit IoT Node

FreeRTOS Demo Sample Application
Getting Started
The Project is based on the FreeRTOS Device Software configuration:
- STM32L4 Discovery kit IoT node with System Workbench for STM32 and GCC
- Including AWS Greengrass Discovery, MQTT, and Thing Shadow Libraries
It has been created and tested with Embedded Studio V3.34.
Hardware Requirements
- STMicroelectronics - STM32L4 Discovery kit IoT node.
To debug the Discovery kit with Embedded Studio, convert the ST-LINK On-Board debug probe into a J-Link compatible probe. In order to get started with ST-LINK on-board and upgrade it to a J-Link OB, just a few steps are necessary:
- Make sure that the ST-LINK USB drivers are installed. Download
- Make sure that the J-Link software package V5.12b or later is installed. Download
- Download the SEGGER STLinkReflash utility. Download
- Start the STLinkReflash utility.
- Agree to the license terms.
- Connect ST-LINK on-board to PC.
- Select Upgrade to J-Link.
- Wait for operation to complete.
- Quit the STLinkReflash utility.
Getting Started
Prerequisites
- Follow the FreeRTOS Prerequisites instructions. (https://docs.aws.amazon.com/freertos/latest/userguide/freertos-getting-started.html)
- Connect and set up the target hardware. (see above)
- Download and install the development environment. (see above)
Open and Build Your Project
- Browse to demos/st/stm32l475_discovery/es.
- Open aws_demos.emProject with Embedded Studio.
- In Embedded Studio select Build -> Build Solution and make sure the project compiles without errors and warnings.
Configure Your Project
Configure Your Wi-Fi Credentials
- From the Project Explorer window, open demos/include/aws_clientcredential.h.
- Specify values for the following #define constants:
- clientcredentialWIFISSID: The SSID for your Wi-Fi network.
- clientcredentialWIFIPASSWORD: The password for your Wi-Fi network.
- clientcredentialWIFI_SECURITY: The security type for your Wi-Fi network. Valid values are:
- eWiFiSecurityOpen: Open, no security.
- eWiFiSecurityWEP: WEP security.
- eWiFiSecurityWPA: WPA security.
- eWiFiSecurityWPA2: WPA2 security.
Configure Your AWS IoT Endpoint
You must specify a custom AWS IoT endpoint in order for the FreeRTOS sample code to connect to AWS IoT.
- Browse to the AWS IoT console. (https://console.aws.amazon.com/iotv2/)
- In the left navigation pane, choose Settings.
- Copy your custom AWS IoT endpoint from the Endpoint text box. It should look like <1234567890123>.iot.<us-east-1>.amazonaws.com</us-east-1>.
- Open demos/include/aws_clientcredential.h and set clientcredentialMQTT_BROKER_ENDPOINT to your AWS IoT endpoint.
Configure Your AWS IoT Credentials
The certificate and private key must be hard-coded into the FreeRTOS code.
FreeRTOS is a C language project, and the certificate and private key must be specially formatted to be added to the project.
- In a browser window, open demos/common/devmode_key_provisioning/CertificateConfigurationTool/CertificateConfigurator.html.
- Under Certificate PEM file, choose the <id>-certificate.pem.crt</id> you downloaded from the AWS IoT console.
- Under Private Key PEM file, choose the <id>-private.pem.key</id> you downloaded from the AWS IoT console.
- Select Generate and save aws_clientcredential_keys.h and save the file in demos\common\include. This overwrites the stub file that is in the directory.
Run the FreeRTOS Samples
- Rebuild your project with Build -> Rebuild Solution.
- Sign in to the AWS IoT console. (https://console.aws.amazon.com/iotv2/)
- In the left navigation pane, choose Test to open the MQTT client.
- In the Subscription topic text box, type freertos/demos/echo, and then choose Subscribe to topic.
- Start the debug session with Debug -> Go.
- When the debugger stops at main(), let it run with Debug -> Continue.
In the MQTT client in AWS IoT, you should see the MQTT messages sent by your device.
System Analysis with SystemView
To understand what the (demo) application does, to verify it behaves as expected, and to find issues, it is best to visualise the true system behavior. SystemView is a real-time recording and visualization tool for embedded systems that reveals this behavior.
The package for the STM32L4 Discovery IoT Node has been created with the necessary changes to record the demo application with SystemView. That includes adding the SystemView target sources, some modifications to FreeRTOS to tweak generated SystemView events, and the configuration of SystemView in the demo application.
Recording the Demo Application
SystemView is already added and configured for the demo application, no changes in the project are required to record it. Follow the Getting Started guide to configure and build the demo and program it to your target.
- Make sure SEGGER SystemView is installed. Download
- Connect to the target via the on-board J-Link.
- Press the (black) RESET button on the target while holding the (blue) USER button.
- The demo will wait for SystemView when the USER button is pressed during startup.
The green USER LED will toggle to indicate it is waiting for SystemView to connect.
- The demo will wait for SystemView when the USER button is pressed during startup.
- Open the SystemView Application.
- Select Target -> Start Recording.
- Configure the target connection.
- Check USB as Connection to J-Link.
- Enter STM32L475VG as Target Device.
- Select SWD, 4000 kHz as Target Interface & Speed.
- Check Auto Detection as RTT Control Block Detection.
- Click OK.
SystemView connects to your target and starts recording. The USER LED will turn off and the demo continues to run.
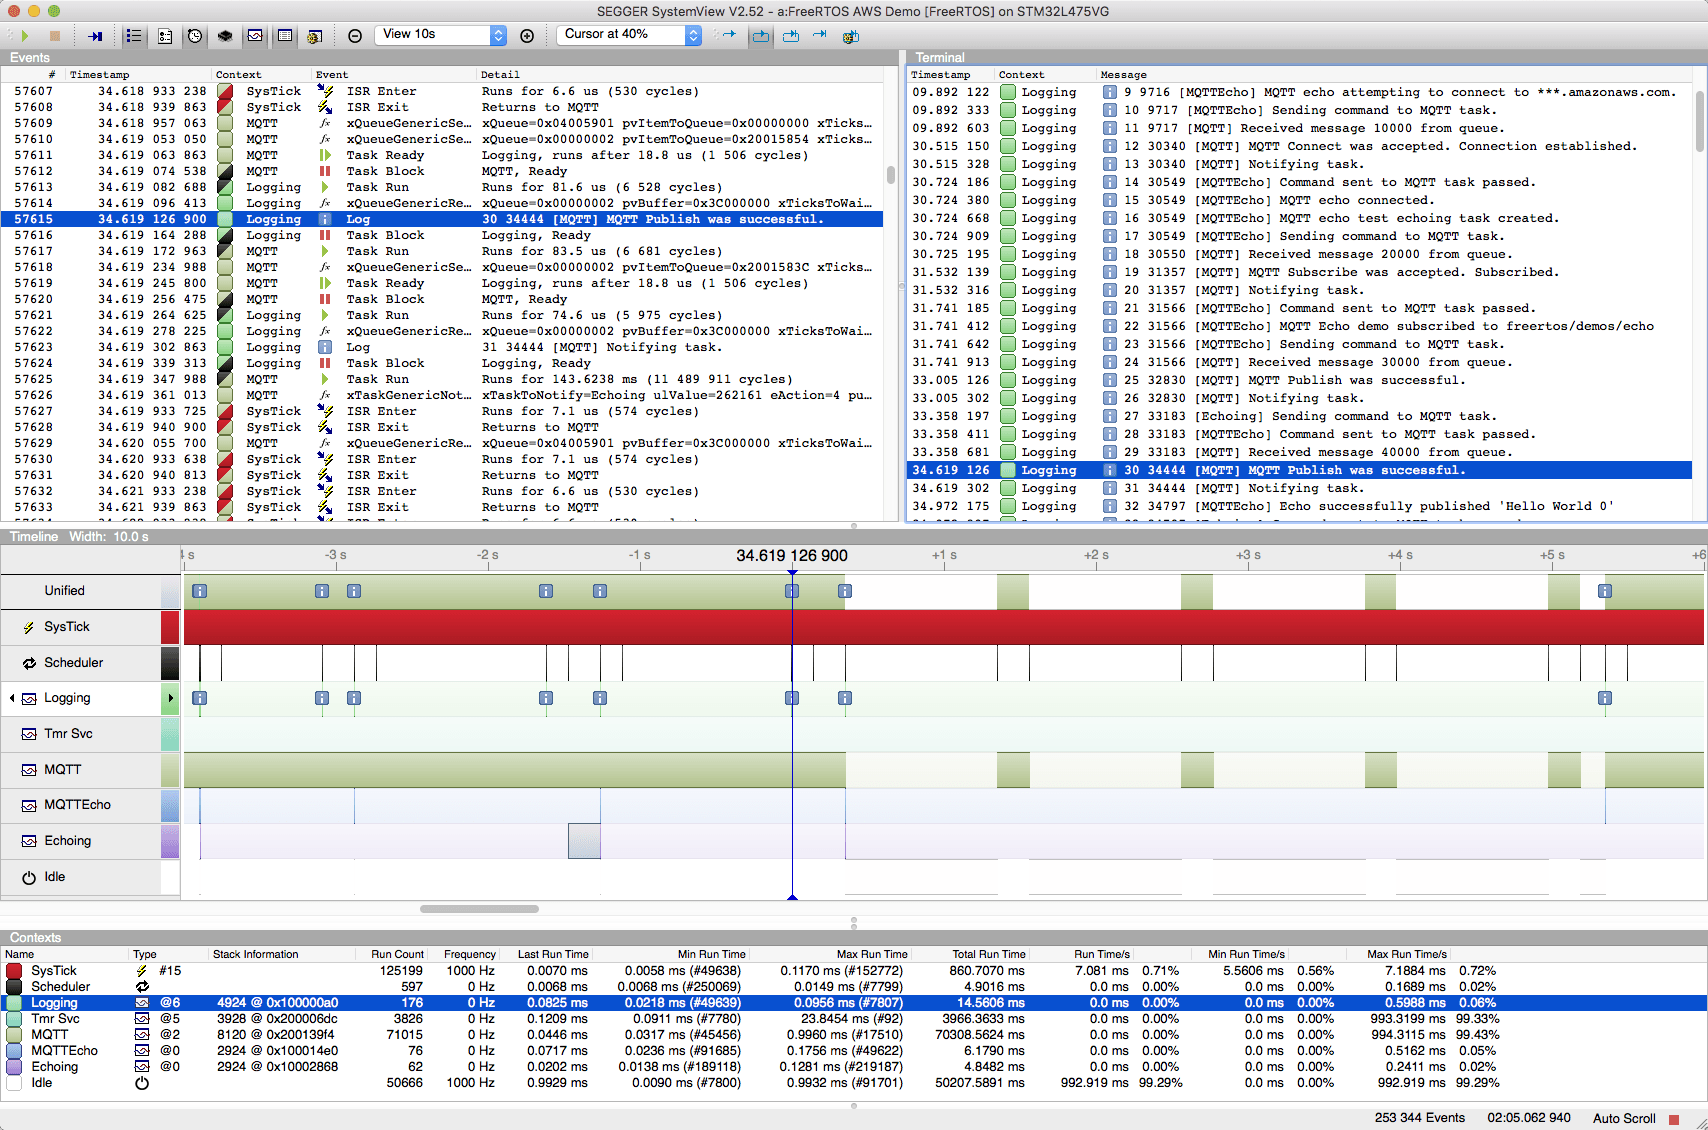
The SystemView Events View shows all events that are sent from the target. Meanwhile the Timeline View visualizes the application flow and synchronization between the system contexts.
All log messages are redirected to SystemView and are shown in the Messages Window. The Timeline View displays a marker per message to allow easy identification of when messages are output. In the Messages Window select a message to see its surrounding context in Timeline and Events View.
When the demo finished, the SystemView recording can be saved to a file for later and further analysis.
NXP - LPC54018 IoT Module
FreeRTOS Demo Sample Application
Getting Started
The Project is based on the FreeRTOS Device Software configuration:
- LPC54018 IoT Module with IAR
- Including AWS Greengrass Discovery, MQTT, and Thing Shadow Libraries
It has been created and tested with Embedded studio V3.34.
Hardware Requirements
- NXP - LPC54018 IoT Module.
- SEGGER - J-Link Debug Probe
- SEGGER - J-Link 9-Pin Cortex-M Adapter
To debug the IoT Module with Embedded Studio, a J-Link needs to be connected to it. The module has 10 pin 0.05" header to connect an external debug probe. Use the 9-pin Cortex-M Adapter to connect it to J-Link.
Project Notes
The contains the following build configuration:
- Debug RAM: Builds and links the application into the internal RAM. Can only run with a debugger, but not stand-alone.
The LPC54018 does not have internal Flash, that could be used to store and execute the application image. Instead the device is connected to an SPI Flash. The device can be configured to load the application image from SPI Flash into RAM, or to execute from the flash (XIP). To create such an application, the project needs to be modified according to the NXP requirements for the LPC54018.
Getting Started
Prerequisites
- Follow the FreeRTOS Prerequisites instructions. (https://docs.aws.amazon.com/freertos/latest/userguide/freertos-getting-started.html)
- Connect and set up the target hardware. (see above)
- Download and install the development environment. (see above)
Open and Build Your Project
- Browse to demos/st/stm32l475_discovery/es.
- Open aws_demos.emProject with Embedded Studio.
- In Embedded Studio select Build -> Build Solution and make sure the project compiles without errors and warnings.
Configure Your Project
Configure Your Wi-Fi Credentials
- From the Project Explorer window, open demos/include/aws_clientcredential.h.
- Specify values for the following #define constants:
- clientcredentialWIFISSID: The SSID for your Wi-Fi network.
- clientcredentialWIFIPASSWORD: The password for your Wi-Fi network.
- clientcredentialWIFI_SECURITY: The security type for your Wi-Fi network. Valid values are:
- eWiFiSecurityOpen: Open, no security.
- eWiFiSecurityWEP: WEP security.
- eWiFiSecurityWPA: WPA security.
- eWiFiSecurityWPA2: WPA2 security.
Configure Your AWS IoT Endpoint
You must specify a custom AWS IoT endpoint in order for the FreeRTOS sample code to connect to AWS IoT.
- Browse to the AWS IoT console. (https://console.aws.amazon.com/iotv2/)
- In the left navigation pane, choose Settings.
- Copy your custom AWS IoT endpoint from the Endpoint text box. It should look like <1234567890123>.iot.<us-east-1>.amazonaws.com</us-east-1>.
- Open demos/include/aws_clientcredential.h and set clientcredentialMQTT_BROKER_ENDPOINT to your AWS IoT endpoint.
Configure Your AWS IoT Credentials
The certificate and private key must be hard-coded into the FreeRTOS code.
FreeRTOS is a C language project, and the certificate and private key must be specially formatted to be added to the project.
- In a browser window, open demos/common/devmode_key_provisioning/CertificateConfigurationTool/CertificateConfigurator.html.
- Under Certificate PEM file, choose the <id>-certificate.pem.crt</id> you downloaded from the AWS IoT console.
- Under Private Key PEM file, choose the <id>-private.pem.key</id> you downloaded from the AWS IoT console.
- Select Generate and save aws_clientcredential_keys.h and save the file in demos\common\include. This overwrites the stub file that is in the directory.
Run the FreeRTOS Samples
- Rebuild your project with Build -> Rebuild Solution.
- Sign in to the AWS IoT console. (https://console.aws.amazon.com/iotv2/)
- In the left navigation pane, choose Test to open the MQTT client.
- In the Subscription topic text box, type freertos/demos/echo, and then choose Subscribe to topic.
- Start the debug session with Debug -> Go.
- When the debugger stops at main(), let it run with Debug -> Continue.
In the MQTT client in AWS IoT, you should see the MQTT messages sent by your device.